 |
每逢佳節倍思親
老家是否安好如昔
就讓如月色般美麗的餡料與餅皮
療癒渴望被愛的人心
月娘酥(又名月娘餅、金沙酥...等)是近年臺灣興起的新版蛋黃酥,其特色在於把傳統蛋黃酥的紅豆沙餡換成了更清爽不油的綠豆沙餡,並將鹹蛋黃處理成碎沙狀,與綠豆沙餡混在一起,餅皮更撒上了黃豆粉一起烘烤,使得整顆月娘酥從裡到外都有如月色般美麗,吃起來口感更是入口即化,味道香而不膩。現在,就跟著我們的食譜自己在家做吧~(附影片)
◆ Golden Moon Pastries
Miss dear ones more on festive occasions.
Is everything all right at the old home?
Let's heal the hearts yearning to be loved
With the gorgeous moon-like filling and crust.
Golden moon pastry, which is like a new version of yolk pastry, is very popular in Taiwan in recent years. Its filling is made of crushed golden salted egg yolks and mung bean paste, which is very light and refreshing, instead of adzuki bean paste. The skin of its crust is also covered with a layer of soya bean flour, which makes the pastry looks like it's shining with golden moon light from inside to outside. Not to mention the aromatic flavour and texture of it melting in your mouth. Now, follow our recipe and make it on your own at home.
. . . . . . . . . . . . . . . . . . . . . . . . . . . . . . . .
. . . . . . . . . . . . . . . . . . . . . . . . . . . . . . . .
材 料(Ingredients):
步 驟(Steps):
(1)
生鹹蛋黃沾米酒後,以 150℃ / 150℃ 烤十分鐘。
Soak the raw salted egg yolks in rice wine. Bake them at 150℃ / 150℃ for 10 minutes.
(2)
五分鐘後,將生黃豆粉放入烤箱與鹹蛋黃一起烤五分鐘。備用。
5 minutes later, bake the raw soya bean flour along with the salted egg yolks for 5 minutes. Set aside.
(3)
將烤好的鹹蛋黃放涼十分鐘後,以湯匙壓碎過篩成細鹹蛋黃末,移除無法壓碎的硬塊,備用。
Let the baked salted egg yolks cool off for 10 minutes. Rub the salted egg yolks through a sieve and remove hard lumps. Set aside.
(4)
將製作油皮的所有食材混合拌勻成團後,密封靜置室溫三十分鐘。將製作油酥的所有食材混合拌勻成團後,與油皮麵團一起密封靜置備用。
Mix all of the ingredients for pastry layer 1 and slightly knead them into a dough. Leave the dough in a sealed box at room temperature for 30 minutes. Mix all of the ingredients for pastry layer 2 and slightly knead them into a dough. Leave the dough in the sealed box along with the dough for pastry layer 1. Set them aside.
(5)
取綠豆沙餡每份 28g 用手壓成圓片狀,包入鹹蛋黃末 6g,輕揉成圓球狀備用。以同樣步驟做出十二個為止。
Take 28g of mung bean paste and press it into a thin round piece. Fold 6g of crushed salted egg yolks in it and round them into a small ball. Repeat the same process until you've made 12 balls. Set aside.
(6)
將油皮麵團均分成 12 份,每份約 18g,用塑膠袋蓋好保濕。將油酥麵團均分成 12 份,每份約 12g,不用蓋塑膠袋。
Divide the dough for pastry layer 1 into 12 pieces. Each piece weighs about 18g. Cover the pieces with a plastic bag to keep the moisture. Divide the dough for pastry layer 2 into 12 pieces. Each piece weighs about 12g. No cover is needed for pastry layer 2.
(7)
將油皮麵團用手稍微壓扁後,包入油酥麵團,以虎口收麵皮,收口朝下,以塑膠袋蓋好保濕。以同樣步驟做出十二個為止。
Press pastry layer 1 slightly with your hands. Fold pastry layer 2 in pastry layer 1. Pull pastry layer 1 between your thumb and index finger until it becomes a small ball. Leave the ball under a plastic bag with its sealed side down. Repeat the same process until you've made 12 balls.
(8)
麵團收口朝上,以擀麵棍擀扁,用手捲起,收口朝下,以塑膠袋蓋好保濕。以同樣步驟做出十二個為止。(第一次擀捲)
. . . . . . . . . . . . . . . . . . . . . . . . . . . . . . . .
材 料(Ingredients):
 |
| 月娘酥食材一覽。圖片來源:cooking23s.blogspot.com |
 |
步 驟(Steps):
(1)
生鹹蛋黃沾米酒後,以 150℃ / 150℃ 烤十分鐘。
Soak the raw salted egg yolks in rice wine. Bake them at 150℃ / 150℃ for 10 minutes.
 |
| 生的鹹蛋黃可自製或到烘焙材料行訂購,通常自製的風味與口感較好。圖片來源:cooking23s.blogspot.com |
(2)
五分鐘後,將生黃豆粉放入烤箱與鹹蛋黃一起烤五分鐘。備用。
5 minutes later, bake the raw soya bean flour along with the salted egg yolks for 5 minutes. Set aside.
 |
| 採用生黃豆粉,之後烤出來的月娘酥表面顏色才不會太深。圖片來源:cooking23s.blogspot.com |
(3)
將烤好的鹹蛋黃放涼十分鐘後,以湯匙壓碎過篩成細鹹蛋黃末,移除無法壓碎的硬塊,備用。
Let the baked salted egg yolks cool off for 10 minutes. Rub the salted egg yolks through a sieve and remove hard lumps. Set aside.
 |
| 也可先用調理機將鹹蛋黃打碎後再過篩。圖片來源:cooking23s.blogspot.com |
(4)
將製作油皮的所有食材混合拌勻成團後,密封靜置室溫三十分鐘。將製作油酥的所有食材混合拌勻成團後,與油皮麵團一起密封靜置備用。
Mix all of the ingredients for pastry layer 1 and slightly knead them into a dough. Leave the dough in a sealed box at room temperature for 30 minutes. Mix all of the ingredients for pastry layer 2 and slightly knead them into a dough. Leave the dough in the sealed box along with the dough for pastry layer 1. Set them aside.
 |
| 左邊的是油皮麵團,右邊的是油酥麵團。圖片來源:cooking23s.blogspot.com |
(5)
取綠豆沙餡每份 28g 用手壓成圓片狀,包入鹹蛋黃末 6g,輕揉成圓球狀備用。以同樣步驟做出十二個為止。
Take 28g of mung bean paste and press it into a thin round piece. Fold 6g of crushed salted egg yolks in it and round them into a small ball. Repeat the same process until you've made 12 balls. Set aside.
 |
| 要使用像這麼乾的綠豆沙餡,將來烤的時候才不會容易爆餡。圖片來源:cooking23s.blogspot.com |
 |
| 綠豆沙餡可自製或到烘焙材料行訂購。通常自製綠豆沙餡的風味較好。圖片來源:cooking23s.blogspot.com |
 |
| 內餡完成示意圖。圖片來源:cooking23s.blogspot.com |
(6)
將油皮麵團均分成 12 份,每份約 18g,用塑膠袋蓋好保濕。將油酥麵團均分成 12 份,每份約 12g,不用蓋塑膠袋。
Divide the dough for pastry layer 1 into 12 pieces. Each piece weighs about 18g. Cover the pieces with a plastic bag to keep the moisture. Divide the dough for pastry layer 2 into 12 pieces. Each piece weighs about 12g. No cover is needed for pastry layer 2.
 |
| 右邊兩列是分割好的油皮麵團,左邊兩列是分割好的油酥麵糰。圖片來源:cooking23s.blogspot.com |
(7)
將油皮麵團用手稍微壓扁後,包入油酥麵團,以虎口收麵皮,收口朝下,以塑膠袋蓋好保濕。以同樣步驟做出十二個為止。
Press pastry layer 1 slightly with your hands. Fold pastry layer 2 in pastry layer 1. Pull pastry layer 1 between your thumb and index finger until it becomes a small ball. Leave the ball under a plastic bag with its sealed side down. Repeat the same process until you've made 12 balls.
 |
| 以虎口收麵皮示意圖。圖片來源:cooking23s.blogspot.com |
(8)
麵團收口朝上,以擀麵棍擀扁,用手捲起,收口朝下,以塑膠袋蓋好保濕。以同樣步驟做出十二個為止。(第一次擀捲)
Take out a dough with its sealed side up. Roll it over with a rolling pin. Roll the dough strip into a cylinder with your hand. Leave the cylinder under a plastic bag with its sealed side down. Repeat the same process until you've made 12 cylinders.
 |
| 擀麵棍的擀法,可先由麵團中間往上擀後,再往下擀。圖片來源:cooking23s.blogspot.com |
 |
| 輕輕捲起來,不要捲太緊,烤好後才會有層次感。圖片來源:cooking23s.blogspot.com |
(9)
麵團收口朝上,用手稍微壓扁後,以擀麵棍擀扁,用手捲起,收口朝下,以塑膠袋蓋好保濕。以同樣步驟做出十二個為止。(第二次擀捲)
Take out a dough with its sealed side up. Press it slightly with your hand. Roll it over with a rolling pin. Roll the dough strip into a cylinder with your hand. Leave the cylinder under a plastic bag with its sealed side down. Repeat the same process until you've made 12 cylinders.
 |
| 擀的時候不要太用力、不要擀太薄,烤好後才有層次感。圖片來源:cooking23s.blogspot.com |
(10)
將麵團蓋好塑膠袋,於室溫靜置二十分鐘。同時將烤箱預熱至 200℃ / 200℃。
Leave the dough pieces covered with a plastic bag under room temperature for 20 minutes. Preheat an oven to 200℃ / 200℃ at the same time.
 |
| 完成第二次擀捲的麵團。圖片來源:cooking23s.blogspot.com |
(11)
麵團收口朝上,以拇指從中間壓下,將兩端往中間捏合,壓扁,包入內餡,以虎口收麵皮,邊轉邊收口,收口務必密實捏合,滾圓,收口朝下,用塑膠袋蓋好保濕。以同樣步驟做出十二個為止。
Take out a dough with its sealed side up. Press its centre with your thumb. Pinch the two ends and press out the dough. Fold a piece of the filling in it. Pull the dough between your thumb and index finger until it becomes a closely pinched small ball. Round it. Leave the ball under a plastic bag with its sealed side down. Repeat the same process until you've made 12 balls.
 |
| 以拇指從中間壓下。圖片來源:cooking23s.blogspot.com |
 |
| 將兩端往中間捏合。圖片來源:cooking23s.blogspot.com |
 |
| 壓扁以準備包入內餡。圖片來源:cooking23s.blogspot.com |
 |
| 以虎口邊轉邊收麵皮。圖片來源:cooking23s.blogspot.com |
 |
| 將收口密實捏合才不會容易爆餡。圖片來源:cooking23s.blogspot.com |
 |
| 包好的麵團,收口朝下,滾圓。圖片來源:cooking23s.blogspot.com |
(12)
將麵團移到烤盤上,撒上過篩的黃豆粉,以 200℃ / 200℃ 烤約二十分鐘後,將烤盤調頭,再烤約十分鐘即可。
Move the dough balls onto a baking tray. Sprinkle some sifted soya bean flour on top of them. Bake them at 200℃ / 200℃ for about 20 minutes. Turn the baking tray around. Bake them for another 10 minutes. Then, voila!
 |
| 盡量將黃豆粉撒到所有可以撒到的麵皮處。圖片來源:cooking23s.blogspot.com |
 |
| 大功告成。圖片來源:cooking23s.blogspot.com |
. . . . . . . . . . . . . . . . . . . . . . . . . . . . . .
. . . . . . . . . . . . . . . . . . . . . . . . . . . . . .
說 明(Footnotes):
(1)
關於自製鹹蛋黃的做法,可參閱我們的鹹蛋黃做法影片與圖文版食譜。
About how to make salted egg yolks, please see our tutorial video and recipe article.
(2)
關於自製綠豆沙餡的做法,可參閱我們的綠豆沙做法影片與圖文版食譜。
About how to make mung bean paste, please see our tutorial video and recipe article.
(3)
月娘酥的餡如果是用自製的綠豆沙,由於加較少的糖,做好的月娘酥只能在室溫下密封保存三天,冷藏保存七天,冷凍保存一個月。
Since homemade mung bean paste contains less sugar, the golden moon pastry can only be preserved for 3 days at room temperature, 7 days in a fridge, or a month in a freezer.
(4)
恭喜網友 jasminum_food 試做成功! Congratulations on jasminum_food's success!
 |
| 圖片來源(Source of the Picture): instagram.com/jasminum_food |
(4)
恭喜網友 子晴 試做成功! Congratulations on TzuChing's success!
 |
| 圖片來源(Source of the Picture): www.facebook.com/100008134538556 |
(5)
恭喜網友 Minna Lai 試做成功! Congratulations on Minna Lai's success!
 |
| 圖片來源(Source of the Picture): www.facebook.com/felizminna |
(6)
恭喜網友 money731010 試做成功! Congratulations on money731010's success!
 |
| 圖片來源(Source of the Picture): instagram.com/money731010 |
(7)
恭喜網友 淑珊 試做成功! Congratulations on 淑珊's success!
 |
| 圖片來源(Source of the Picture): www.facebook.com/100000139642630 |
(8)
恭喜網友 zhenwei.z 試做成功!Congratulations on zhenwei.z's success!
 |
| 圖片來源(Source of the Picture): instagram.com/zhenwei.z |
(9)
恭喜網友 polly lin 試做成功! Congratulations on polly lin's success!
 |
| 圖片來源(Source of the Picture): www.facebook.com/100000054286179 |
(10)
恭喜網友 Faye Liao 試做成功! Congratulations on Faye Liao's success!
 |
| 圖片來源(Source of the Picture): www.facebook.com/faye.liao.9 |
(11)
恭喜網友 家菱 試做成功! Congratulations on 家菱's success!
 |
| 圖片來源(Source of the Picture): www.facebook.com/827958819/ |
 |
| 圖片來源(Source of the Picture): www.facebook.com/827958819/ |
(12)
恭喜網友 Kiki 試做成功! Congratulations on Kiki's success!
 |
| 圖片來源(Source of the Picture): www.facebook.com/kiki.chang.902 |
(13)
恭喜網友 馨方 試做成功! Congratulations on Shinfan's success!
 |
| 圖片來源(Source of the Picture): www.facebook.com/shinfan.hsu |
(14)
恭喜網友 李太 試做成功! Congratulations on 李太's success!
 |
| 圖片來源(Source of the Picture): www.facebook.com/beadsgallery |
(15)
恭喜網友 Claire 試做成功! Congratulations on Claire's success!
 |
| 圖片來源(Source of the Picture): www.facebook.com/claire.mo.378 |
(16)
恭喜網友 Crystal 試做成功! Congratulations on Crystal's success!
.jpg) |
| 圖片來源(Source of the Picture): www.facebook.com/crystal.chau.754 |
(17)
恭喜網友 han013019 試做成功! Congratulations on han013019's success!
 |
| 圖片來源(Source of the Picture): www.instagram.com/han013019/ |
(18)
恭喜網友 雷殘 試做成功! Congratulations on 雷殘's success!
 |
| 圖片來源(Source of the Picture): www.facebook.com/profile.php?id=100000427321311 |
 |
| 圖片來源(Source of the Picture): www.facebook.com/profile.php?id=100000427321311 |
(19)
恭喜網友 張小姐 試做成功! Congratulations on Ms. Chang's success!
 |
| 圖片來源(Source of the Picture): 張小姐(Ms. Chang) |
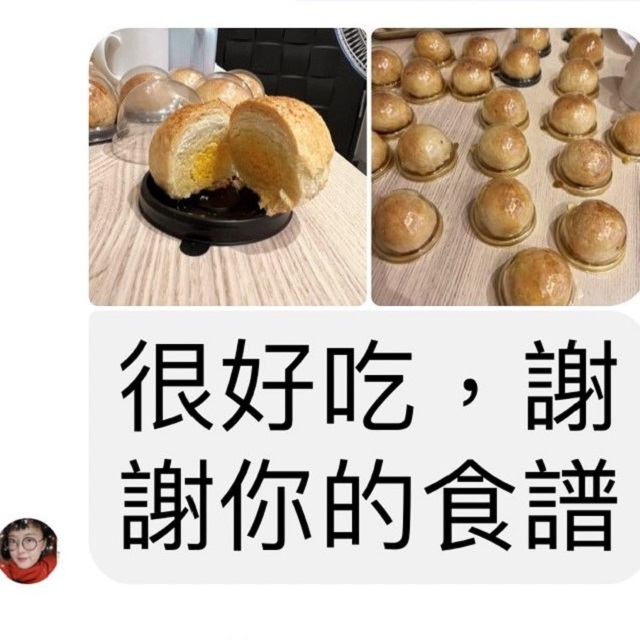
(20)
恭喜網友 吳瑗瑗 試做成功! Congratulations on 吳瑗瑗's success!
 |
| 圖片來源(Source of the Picture): www.facebook.com/profile.php?id=100000297680060 |
(21)
恭喜網友 Rachael 試做成功! Congratulations on Rachael's success!
 |
| 圖片來源(Source of the Picture): www.facebook.com/rachael.lin.10 |
😺:記得訂閱YouTube頻道哦~ 您的鼓勵就是最大的動力。
留言
張貼留言